Translate

Tuesday, March 19, 2013

Real Angel Food Cake!

I have had angel food cake and I like it except when it's like that hard rock crap that is grainy and undesirable. It must melt in your mouth like cotton candy and not absorb any and all moisture from anything that comes within 2 inches of it. I have been looking for a recipe that embodies the essence of angel food cake and I found it so here it is!.

Ingredients

1 3/4 cups sugar
1/4 teaspoon salt
1 cup cake flour, sifted
12 egg whites (the closer to room temperature the better)
1/3 cup warm water
1 teaspoon orange extract, or extract of your choice
1 1/2 teaspoons cream of tartar

Directions

Preheat oven to 350 degrees F.

In a food processor spin sugar about 2 minutes until it is superfine. Sift half of the sugar with the salt the cake flour, setting the remaining sugar aside.

In a large bowl, use a balloon whisk to thoroughly combine egg whites, water, orange extract, and cream of tartar. After 2 minutes, switch to a hand mixer. Slowly sift the reserved sugar, beating continuously at medium speed. Once you have achieved medium peaks, sift enough of the flour mixture in to dust the top of the foam. Using a spatula fold in gently. Continue until all of the flour mixture is incorporated.

Carefully spoon mixture into an ungreased tube pan. Bake for 35 minutes before checking for doneness with a wooden skewer. (When inserted halfway between the inner and outer wall, the skewer should come out dry).

Cool upside down on cooling rack for at least an hour before removing from pan.

Yes this is Alton Brown's recipe from the show Good Eats! You are my hero Mr. Brown.
And because of the wonderful orange extract I tried. I put a little chocolate sauce on the plate and it's like having the most heavenly chocolate orange after taste ever! The kind of after taste you wish wouldn't go away but alas it does.

Because of this very amazing recipe I now grind all my sugar in a food processor for all cakes. In fact I made a chocolate cake today with strawberry filling and the fine sugar really makes a difference!

Friday, March 15, 2013

If you like doillies, kittens or being alive, then you'll love this!

Oldfield Bread Pudding with Crown Royale Caramel Sauce

Amount Per Serving (20 total)

10 slices day-old bread

3 tablespoons butter, melted

1 cup raisins (optional)

7 eggs, beaten

3 cups milk

1 1/4 cup dark brown sugar

2 teaspoon ground cinnamon

2 teaspoon vanilla extract

1. Preheat oven to 350 degrees F (175 degrees C).

2. Cut bread into small 1/2" to 1" pieces into an 9 x 13 inch square baking pan. Drizzle melted butter or margarine over bread. If desired, sprinkle with raisins.

3. In a medium mixing bowl, combine eggs, milk, sugar, cinnamon, and vanilla. Beat until well mixed. Pour over bread, and lightly push down with a fork until bread is covered and soaking up the egg mixture.

4. Bake in the preheated oven for 45 minutes, or until the top springs back when lightly tapped.

5. Meanwhile heat 1 cup granulated sugar, 1 stick (1/2 cup) non-salted butter, 2 tsp vanilla extract, 1 beaten egg on medium high in sauce pan. Watch it carefully ad to not burn, turn down to simmer and add 1/4 cup Crown Royale, constantly stirring.

6. Serve piece with sauce and whipped cream on top.

Saturday, March 9, 2013

Break out the Italian in you!

Rosemary and Olive Oil Cottage Fries.

It's really simple too! Rosemary, Salt, Olive Oil and Potatoes (cut up into 1 inch cubes).

Instutructions:

Toss potatoes in Olive oil and lay out on a cookie sheet covered in tin foil. Sprinkle with the Rosemary and Salt to taste and cook in an oven at 350 for 20 minutes or so. Be sure to turn these little guys half way through so you get two crisp sides to your potatoes!

I make these all the time they are my family's favorite!

Bon Apetite!

Friday, March 8, 2013

Friday Favorite Side's

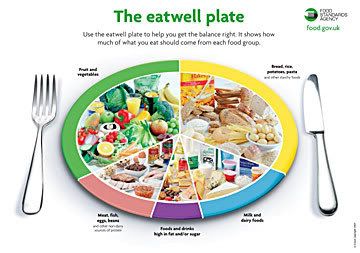
Did I mention I'm a full time away from home working mommy? I often tell people I work three jobs. One for my Employer, One for my church, and one HUGE one for my family. I carry a lot loads and wear many hats as most women in today's world do. So I love when I can spend an hour or less in the kitchen to have a nutritious, healthy dinner and because my own mother was so meticulous about plating I want that food to look good! Side dishes help me with that. Side dishes can help balance the nutrition on your plate along with color and texture and consistency. Today I'm going to post one vegetable three ways. It's a green vegetable because I love greens and because this week is all about green veggies in honor of the month of March! Next week we'll cover all shades of orange in honor of the "gold" at the end of the March rainbow. You love me you know you do!!

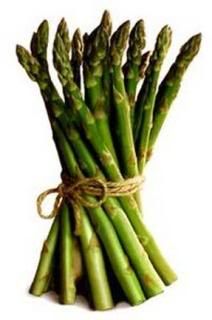
Asparagus three ways.
Asparagus, most people either love it or hate it. It has a very distinctive flavor when eaten raw (don't eat it raw) that flavor can either be enhanced or diminished depending on what you do with it. Food needs you to have an open mind and remember that cooking is an art there really aren't any rules except one. Don't poison anyone.

Asparagus Grilled:

Vegan and Vegetarians know all about grilling vegetables because it's all they eat. For those of us that eat meat we may need a little guidance into the world of grilling veggies. Here's what I've discovered after burning and dropping lots of them on the grill.
1) tin foil is awesome..use that shit!
2) put your veggies on last because they take way less time to cook on an open grill.
3) seasoning is good, too much seasoning is a disaster.

Like anything else you'll need to wash them first. Remember fruits and veggies are grown in dirt and other things so wash those suckers because the only rule in cooking is what? DON'T POISON ANYONE.
Lay the washed asparagus out on some paper towels or a kitchen towel if you're like me. Dry them. I figure that goes without saying but I'd better throw it in there. Now gather up those tender stalks of yumminess and lay them out on a baking sheet. Season them taste. I like to use some minced garlic, cracked pepper, and a teeny tiny bit of sea salt. Salt is great it moves the flavors through your mouth but be very careful with it because it's very strong as well. Now you can use a drizzle of olive oil if you'd like or you can just grill them like that. Place them on the tin foil on the grill and close the lid. They will cook quickly so don't walk too far away. You want them soft at the tops and firmer toward the bottom of the stalk. Well that's how I like them you can cook them to whatever consistency you like. Bam that quick that delicious and that's how you grill asparagus.
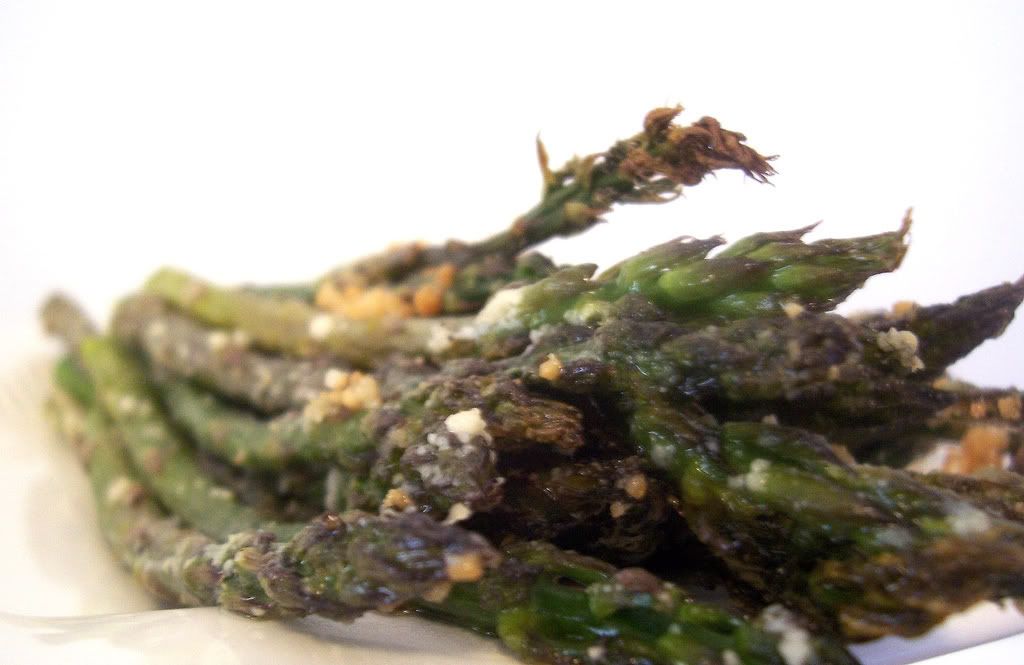

Asparagus Roasted:
It's not a secret that roasting veggies brings out a bright flavor. It's one of the reasons that cooks and nutritionists will tell you that if you are trying a veggie for the first time and not sure if you'll like to roast it. You'll get the true flavor of the veggie without any interference from other flavors. To roast asparagus simply move the rack in your oven from the middle to one rung up. If your oven is like mine you have multiple places you can move the oven rack to. I like to roast my veggies higher up in the oven. I don't know why it could be my OCD kicking in. Roasting veggies is the easiest way to cook a vegetable. All you need to do is pre-heat your oven to 350 degrees, wash and dry your asparagus, lay them out on the cookie sheet, or roasting pan if you have one, or stoneware if you have that. It really doesn't matter just make sure it's flat so all of the Asparagus is laid out and open to the heat.
Seasonings: I'm going to list a few from easy to complex and you can mix and match and pick and choose or try something completely different because this part is all about your own tastes.

Seasonings that I've tried and taste good on Asparagus:
Olive Oil. use sparingly.
Sea Salt: use very sparingly
Pepper both regular shake and cracked. Enough that you can see the black pepper flakes on all of them.
Garlic: powder, salt, or minced. If you use powder use it gently, it has a stronger taste than fresh garlic because it's concentrated the same goes if you use the garlic salt. I prefer fresh garlic all the time when cooking but I have tried these other two.
Tony Chachere's: this is hands down the BEST Creole seasoning salt you'll ever buy. Their slogan is "Great on everything" and IT'S TRUE!!!! Anytime I need to use a seasoning salt this is the only one I pull out. You can buy it in sodium free, and gluten free, as well as regular. I love this stuff so much I'll even post a picture for you all so you can buy some yourself.
Tony's is a tad spicy and the more you use of it the spicier it will make your food so if you're new to Tony's try it on your finger before you shake it all over your food.
Cheese: Parmesan, and mozzarella are good cheeses to pair with Asparagus.

That's it really for seasoning. You want to keep it light so the true flavor of the root vegetable can come through. Once you've got them seasoned the way you like them pop them in the oven at 350 and roast for about 15 to 20 minutes depending on your stove and the altitude you live at. You want them be browned on the edges and bright green everywhere else.


Asparagus Pan Fried:

O.k. I'll be honest this is not my favorite way to east asparagus but my kids and some people I know who don't really like the taste of asparagus have raved about eating it this way. Basically you're going to make asparagus fries.

1st. Step: Soak your asparagus in buttermilk for about 30-40 minutes.

2nd Step: In a large bowl combine 1 cup flour, 2 tbsp. corn meal, 1 egg and mix until smooth.

3rd Step: Get out your biggest Skillet and heat the oil for frying.*
You can use a deep fryer if you have one I just don't have fancy gadgets like that.

4th Step: Remove the asparagus from the buttermilk and roll in the wet batter and drop that in the heated oil. Simply fry till the batter is cooked through. Do that for all of the Asparagus.


Dipping sauce: Because you know you can't eat fries without SOMETHING to dip them in!!!
Just say no to Ketchup on this one!!
You want to use a nice light Ranch dressing or Blue Cheese salad dressing.

I hope you find at least one of these way to eat Asparagus delicious and fun! Happy Friday All!!


Tuesday, March 5, 2013

Incredible Edible Sides!


This weeks blog is dedicated to the side shows, the food, not the people. Sides dishes are honorary guests at the main event. A good side dish can enhance the meal and a bad side dish can make a fantastic main dish seem just so so. I'm a perfectionist in recovery and one of my "coping" mechanisms is to make sure I have a well rounded meal on my families plate. Yes we eat in a clockwork pattern! Don't judge me!! I find tackling nutrition is 2 parts learning to read labels, even labels on produce, and 1 part geometry. It's easier to remember how much a portion is if you use the dinner plate to divide things up. Side dishes not only help you keep your portion distortion in check they can help fill you up the right way.

As you can see from this picture whole grains and veggies/fruits should make up the majority of your plate. DON'T FRET!!!! This week we're going to show you how to jazz up those sides so you will not only enjoy eating them but look forward to it as well. OK now for the rules:
First rule of MOM VS FOOD CLUB; we don't talk about MOM VS FOOD CLUB!! lol just kidding feel free to talk..as a matter of fact talk A LOT about us!!

Second rule of MOM VS FOOD CLUB: Take the words nasty, gross, and any other preconceived notions you have of foods and throw it out the window. Laurie and I are going to show you that you can like and sometimes even love foods that are good for you. It's all about TRYING and TRUSTING us. We're not professional nutritionist or dietitians. We're everyday moms who have fought and lost more times than we can count the battle against food. We've fallen and gotten back up and we're here to share with all of you the tips and tricks and recipes that have helped us finally become successful.

Today's  recipe is what I like to call the unhealthy brussel sprout. I know, I just went on and on about nutrition and the first recipe I give you has UNHEALTHY right in the title. Just relax and remember the second rule of MOM VS FOOD club, trust.

Ok there are a few things you can sub out for some of these ingredients so feel free to play with this and find out what works for you. I'm going to give you the basic recipe and you can experiment or stay with the basics whatever makes you comfortable. Ingredients marked with an asterisk are interchangeable.

UNHEALTHY BRUSSEL SPROUTS

1lb of Brussel Sprouts fresh if you can get them frozen if you can't.
3-4 strips of bacon*
grated Parmesan cheese

Brussel Sprout preparation:
FRESH: Sliced brussel sprouts lengthwise down the middle and steam on stove top. (If you don't have a vegetable steamer you can par-boil the brussel sprouts in a pot of water with a lid)
FROZEN: If you're using frozen brussel sprouts you'll use the microwave. Open the bag and place the frozen brussel sprouts in a microwave safe container, I use a glass pyrex mixing bowl, cover with saran wrap tightly, you want to make sure you have a good seal on that bowl. Once you get it tight you're gonna poke a few holes in the top. Congratulations you've just made your very own re-usable steaming pouch! Now place that whole thing in the microwave and microwave for about 3-4 minutes. You want to make sure the brussel sprouts are bright green in color and you can leave these whole as frozen brussel sprouts tend to be much smaller in size.

While your brussel sprouts are steaming/par boiling get out a large skillet and fry your few strips of bacon. Once the bacon is good and extra crispy remove it from the skillet and let it dry on a paper towel. Keep that bacon grease in the skillet.


Now I'm going to use my fancy words. Take your steamed/parboiled brussel sprouts and you're going to lightly saute them in the bacon grease. They should like this>
You're only lightly sauteing them so they won't be staying in the bacon grease long.

Next step: Remove them from the bacon grease and place into a casserole/baking dish. Sprinkle with the grated Parmesan. Crush up that extra crispy bacon and put that into it as well. Pop that bad boy into the oven at 350 and bake for about 15 to 20 minutes or until the Parmesan cheese browns up. That's it you're done and it tastes AMAZING!!

For years I thought I HATED brussel sprouts and then a friend of mine made these for me and I was hooked. The best part is my kids ask for these all the time.

Now remember earlier I said I was going to give you some substitutions. I haven't forgotten about that either. Here are some tasty substitutions for this recipe.
Instead of pig bacon use Turkey bacon, less grease but you still get that bacony taste and that's what we're after with this recipe.
Instead of Parmesan cheese you can use low/part skim mozzarella cheese.

Some ways to play with this recipe, instead of using bacon or cheese you can skip all of that and use fresh cranberries and slivered almonds. Prepare the brussel sprouts the same way, place in a large skillet with fresh cranberries and a tbsp of olive oil (too keep things from sticking to pan) saute over low to medium heat until the cranberries burst open. Remove from the skillet and mix in a bowl with slivered almonds.

The important thing with this basic recipe is to prepare the brussel sprouts before adding any thing else. Steaming and parboiling them seems to take a lot of the bitterness out of this vegetable. You can mix it up with other veggies, nuts, meats, and cheese to create a flavor that fits you and your family.

Happy Healthy Eating Everyone!


Saturday, March 2, 2013

Baked Chimichanga's

I love Chimi's what I don't love is the fact that their fried. I have PCOS so nutrition is VERY important to me in order to maintain my health without prescription drugs. A few years ago I embarked on a mission to find healthier ways to eat the foods I loved. Chimichanga's are basically fried burritos, fried as in deep fat fried, so my mission was to first find a way to recreate the crispy tortilla without frying. Well what's the opposite of frying? Baking! So here's the recipe with pictures as well.

Ingredients you'll need:
1lb ground beef
1/2 onion diced
1 can black beans (rinsed and drained)
1 tbsp. minced garlic
1/4 tsp. cumin
2 tbsp. chili powder
2 15ozs. tomato sauce
1 4oz. can green chilli's
1 4oz. can diced jalapeño's
1 1/2 cups shredded cheddar cheese

I would consider gathering all the ingredients before you start.
First brown the ground beef until there's no pink left then drain and rinse the can of black beans, mince the garlic and dice the onions. Put the onions, garlic, and can of black beans along with the chilli powder,cumin, and a 1/2 cup of the tomato sauce into the skillet with the ground beef and cook over low/medium heat. You won't need the oil in the picture I just forgot to put it away. Ha! When you're filling for the chimichanga's is done it will look like this:
Yeah it smells as good as it looks :)

The next step is to warm up the tortillas. I highly suggest you either make your own tortillas or make sure you buy the thicker softer tortilla's at the grocery store. These will need to be warmed so as to avoid tearing when you go to roll them. Remember this is a basically a burrito that's fried but we're going to bake it! So grab your warm tortilla and spoon the filling into the middle and fold and roll just like a burrito, once you got them all assembled you'll put them on a baking sheet and you'll brush melted butter over the tops and sides of them.
Make sure you've pre-heated your oven to 350 degrees before placing the chimichanga's into the oven. Set your timer for 25 minutes and bake chimichanga's until golden brown.
Now what's a chimichanga without the awesome red sauce right? I have a super super easy and delicious red sauce but it is spicy so add jalapeños to taste. In a saucepan pour in the remainder of the tomato sauce add the can of green chilli's and the can of Jalapeños and heat to a simmer.

Once the Chimi's are done simply place on a plate and cover in red sauce and shredded cheddar cheese. This recipe takes 15 minutes for prep and 30 minutes to cook. I wish I had a picture of the finished product but my family ate all up too quickly! 

Friday, March 1, 2013

Day 2 on hold...

Today I really have been battling with my pre-PMS-eat-everything-in-sight-until-I-finally-consume-something-that-satiates-me. My doctor says it is in fact serious: I seriously eat a lot, I seriously yell a lot and I seriously have cramps that make me wish I could bite the head off of a bat.
 Not the animation you expected was it? MUAHAHHAA
Anywho. I have the best thing that will satiate your need to kill your significant other with a large rock given to you by a rock star with aphasia. Made up, with a handful of ingredients, by my husband which is notably safe tonight for making me these >:}

I started today by making popovers in my new popover pan that I received today. They are SO easy that my 3 year old basically made them I just helped with the dangerous stuff.

Popovers

1 Cup and 3 Tblsp. All-Purpose Flour
2 Eggs (room temperature, I.E. let sit out on the counter for 30 minutes)
1 Cup of Whole Milk (room temperature)
1 tsp. Salt
1 tblsp. unsalted (melted and cooled) and 1 tsp. (unless you have non-stick) unsalted room temperature butter to grease the wells.

Heat the oven to 400 degrees F.

Grease a 6-cup popover pan with the 1 teaspoon of butter.

Combine the 1 tablespoon of butter, the flour, salt, eggs and milk in a food processor or blender and process for 30 seconds.

Divide the batter evenly among the cups of the popover pan, filling each one-third to one-half full. Bake on the middle rack of the oven for 40 minutes, taking care not to open the oven door. Remove the popovers to a cooling rack and pierce each one in the top with a knife to allow steam to escape. 
I will not take credit for the popover recipe. I gotta give credit to Alton Brown on Good Eats and here's the link in case you want to see: http://www.foodnetwork.com/recipes/alton-brown/basic-popovers-recipe/index.html
 
Now I am proud to introduce the Matryoshka!
 
You will need:
 
Popovers, caramel syrup and/or chocolate syrup, vanilla bean ice cream, maraschino cherries and whipped cream.
 
With a serrated bread knife cut the puffy top off without crushing the well (the empty space within the popover) and clean out any 'hymen' blocking the well on either side.
 
 
Drizzle caramel syrup (optional but highly recommended) in the well and top with vanilla bean ice cream to the top gently stuffing it into it.

Place cherry(ies) on top.
Take other side of Popover and drizzle it with chocolate syrup (optional but highly recommended) and fill that baby up with whipped cream.
Then gently squish those together, like mid-twenties lovers with some privacy, and v'iola! Cream puff for one hand and an ice cream cone for the other.

I was so surprised how much better the "ice cream cone" was than the famous fast food restaurant's ice cream cone where you basically only eat the cone because you can't lick the ice cream out of the overly dry, moisture sucking cardboard carrier or because you don't readily have a place to throw it away because your in the car.

This wonderfully sinful sweet and a tad salty, little ditty has a whopping 424 calories but it will satisfy your nightly hording of the kitchen during that week where nothing can satiate you and you end up eating way more than that in cals anyways. Or on a hot summer BBQ where the kids are running around and they won't stop EATING EVERYTHING because they are now burning calories just breathing.

Yes ladies, your welcome!

Bon Appetit!


Thursday, February 28, 2013

Winner Winner Chicken Dinner!


Day  1: She was mildly pretty and picked us up: My cellmate and I, in the plastic bag that bound us. It was a long and frigid ride in the trunk of her car although it felt warm to me compared to the cooler that we were tossed into with the other coupled hostages. I felt lucky to be on the top at the time, not being squished by all the other bagged and thrown around ones in the cooler.
My thoughts ripped away from me by the blinding light as the trunk opened and I saw her standing there her hand seemed to be in slow motion as she picked up our bound lifeless forms and took us into, what I assume was her house. I didn’t notice before but she was being followed by a little midget that resembled her greatly. I chuckled to myself trying to block out the cold with humor, wondering if I had slipped into deep psychotic state and imagined I was in the spy spoof movie in which a tiny clone of this woman was made to follow her around.
She slammed me down on the clean counter and ripped the bag open taking my partner in crime to a large freezer and tossing him in like he was nothing but a chunk of meat. I was left there helpless for many hours until a man came into the house and sat down on a plush sofa. Now the midget was following him about. She picked me up by the secondary bag that kept my innards from spilling free and hung me upside down for the man to approve of. His nod was neither impressed nor unimpressed. Perhaps I should have been glad about this but I nearly longed for the chilly cooler back at my captors’ location.
Another long chunk of time had passed and then the man came and ripped the bag open, washing my flesh clean and well…I’d rather not talk about where he stuck his hand to rip out my innards. I prayed to God that I not feel nor remember this. Why was I left in this lifeless body as I realized I was in fact a whole fryer chicken ready to be eaten.
1 Fryer chicken butterflied
3-5 Medium Potatoes cubbed (Depending on your family size, cut up 1 potato for every member)
3-4 Carrots sliced (Depending on your family size, cut up 1 carrot for every member)
1 lb of halved brussel sprouts.
2 sprigs of fresh Basil (Stems removed)
Paprika to taste
Sea salt & freshly ground pepper to taste
Oregano to taste
Rosemary to taste
Olive Oil

Instructions:
Preheat Oven to 475. Toss vegetables and potatoes in olive oil. Place carrots and potatoes around the outside of a large cookie sheet or a cooking tray with a 1-2 inch vertical lip. Place halved brussel sprouts in the center along with the basil. Place the butterflied chicken over brussel sprouts and basil. Sprinkle with olive oil, paprika, sea salt, rosemary and oregano to preference and bake at 475 for 45 minutes. Then turn down the oven to 350 and bake for approximately 30 more minutes until meat thermometer reads at least 165, for safe consumption. Bon Appetite!
With the leftover chicken pick off all meat you can and store in freezer for future meals or the fridge for the next day’s dinner which will be included in my next post. Place bones, fat and gristle (and any vegetable left overs or tops, stems or any waste) into large stock pot with water and on medium high heat cook for a few hours then move to a simmer overnight or transfer to a crockpot on low. In the morning turn off and cool. When cooled down enough, place in refridgerator. Skim off fat and you have fresh and flavorful chicken broth!